One Lovely Blog Award

Thanks to Kimberly Ann, I have been nominated for the One Lovely Blog Award!

To visit Kimberly Ann’s blog click here

Image

So the rules of the awards are to…

1. Thank the person who nominated you.

Once again, Thank you Kimberly Ann! You’re the best…

2. Name 7 things about myself that you don’t already know.

• I absolutely love music and don’t know if I could handle one day without it!
• A few of my favorite bands are: Death Cab for Cutie, Needtobreathe, Florence + The Machine and Mumford and Sons.
• I don’t have any tattoos for fear that I will be addicted.
• My favorite colors are mint green and coral.
• I love all things antique and vintage.
• I have only one sibling, we are nine years apart and she is my very best friend in the entire world.
• I want to start my own antique boutique of new things made old!

3. Nominate 5 blogs that I love.

• My wonderful friend Allis’ blog featuring: Photography. Food. Fashion. Crafts. Travel. – Simply Allis
• Karl Barrett’s intriguing urban landscaping – Landscape Urbanite
• Some fabulous “Homemade stuff lazily produced” – cosycrafter
• Bec’s blog of colour, texture & photography – Clouds of Clour
• I love these arts and crafts – M&J Blog

4. Let each person know you nominated them for the award!

Extra! Extra! Read All About It!

This morning I decided I wanted to do something new with my nails. I had heard through the grapevine that you could use rubbing alcohol to transfer news print onto surfaces. Here goes!

To begin, I applied a clear coat to protect my natural nails.

Once the clear coat had dried, I then applied a coat of light gray. I chose a light gray so that the nails would actually look like a newspaper.

Tip: If you’re going to try this, make sure before starting another step that your nails have completely tried.

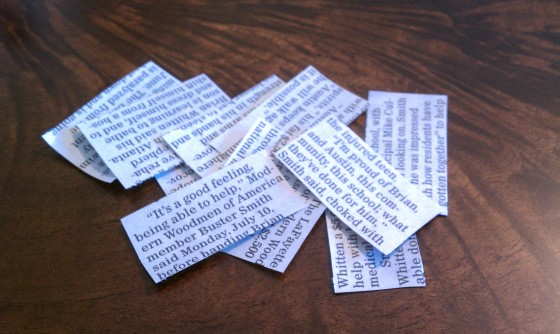
I thought at this point, I should go ahead and have newspaper pieces cut out and ready to use. This is the one time I’ll deter recycling, it’s best to start with a fresh piece for each nail.

Once my nails were completely dried, I dipped my finger in rubbing alcohol. You should leave your finger in the rubbing alcohol for about 5 seconds.

Immediately after dipping my nail in the rubbing alcohol, I placed a piece of newsprint on the nail. I found that 15 seconds was a nice time frame for holding the print on your nail.

Tip: This step works much better if your nail is dripping wet! When I first tried this look, I shook the alcohol off and then held the newspaper to it. Sadly, the newspaper stuck to my nail…wah wah.

After 15 seconds had passed, I pealed off the newsprint and viola!

I quite literally had the news at my finger tips!

Try out this look! It’s very fun and looks awesome!

Refurbished Leather Bag

This past week a friend and I took a trip to Nashville for his birthday to see Death Cab for Cutie for the second time. This is a photo from when we saw them last year. Who knew you couldn’t pictures at the Ryman?

Death Cab for Cutie

Death Cab for Cutie at Mud Island Amphitheater in Memphis, TN.

While we there, some friends and I went to the Goodwill Outlet to see what we could find. Not too long after we had been there I found this awesome leather bag for $2!

The bag was kind of stained and not really my favorite color. I soon decided that I would try to dye it! I was a little worried because I’ve never tried to dye leather.

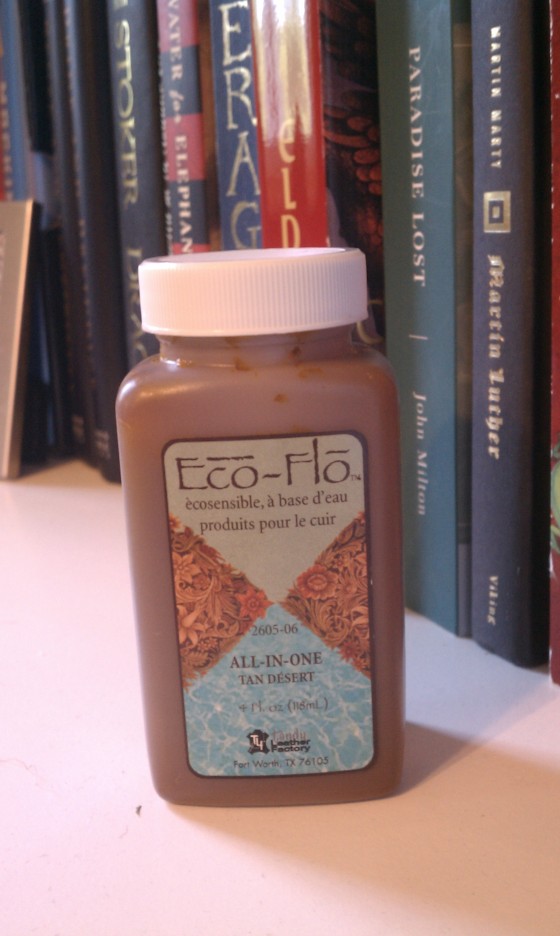
I went to Hobby Lobby and purchased  “All-In-One” Tan leather dye for about $3.

As it turns out, leather dye is extremely easy to use! All you do is wipe it on the leather and it immediately soaks into the fabric. I continued to apply coats to achieve the desired color. Once I thought I’d succeeded, I let the bag dry thoroughly outside.

Helpful hint: If you’re using leather dye, make sure and wear gloves! A no-brainer I’m sure; however, I had a hole in my glove and still have a brown spot on my finger!

This is the bag completely dyed. I knew it would make it look cleaner, but I had no idea it would make the bag feel different. The bag was pretty warn to begin with but once I’d dyed it, it felt much thicker!

While I was at the Hobby Lobby, I found this awesome charm for a necklace. It was half off at the time so I decided to get it and decide later what I’d do with it.

After I started looking at the bag, I thought it needed something else. That’s when I remembered the charm I’d bought!

I used a thimble to help carefully make holes with a needle in the thick leather and then sewed the charm on using the jewelry rings.

This has quickly become my favorite bag. And the best part is…it cost me less than $10!

Shabby Chic Window Mirrow

Recently my dad has made some improvements around the house which has left us with a garage filled with used odds and ends waiting to be thrown out. Some of the many things that can be found in our garage are old windows. I’d been thinking about how awesome they were and what I could turn them into.

Then it hit me, I needed a shabby chic window mirror.

Here are some photos that I took along the way.

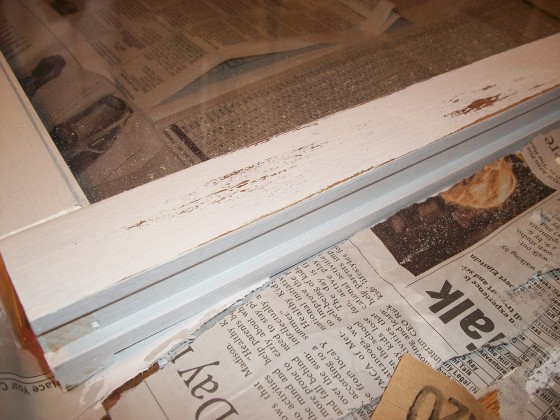
I started the process by cleaning and repainting the window.

Once the frame was completely dry, in order to make it look shabby chic, I used sand paper to remove some of the paint so that the wood was visible.

Once the entire window was painted and had been sanded, I measured the glass and set out to the local hardware store to get a mirror custom cut to fit into my window and some strong glue.

The next step was to glue the mirror to the glass inside the window.

I used liquid nails since it was one of the only glues I could find that worked well with mirrors. After I put the glue on the glass, I carefully laid the mirror inside the frame.

Once the glue dried, I took a caulk gun and caulked around the edges of the mirror to fill in any cracks. This step is also helpful to prevent anyone cleaning the mirror later from getting cut.

All that was left to do was readjust the cross hares and hang up my new creation!

And there you have it! One fairly easy to make chabby chic mirror. For more information, or if you have any questions about my method, feel free to leave me a comment.

Lace Dress

Recently I was asked to be a bridesmaid in my friend Rachel’s wedding. The bride decided fairly quickly on the color teal and a vintage theme. I was on quite a tight budget at the time but I really wanted to find a dress that fit the theme.

After countless hours of searching for the perfect color and price to fit my budget, I made the joke that I’d probably be better off just make my own dress.

One thrift store and few boxes of dye later, I decided I’d take my chances.


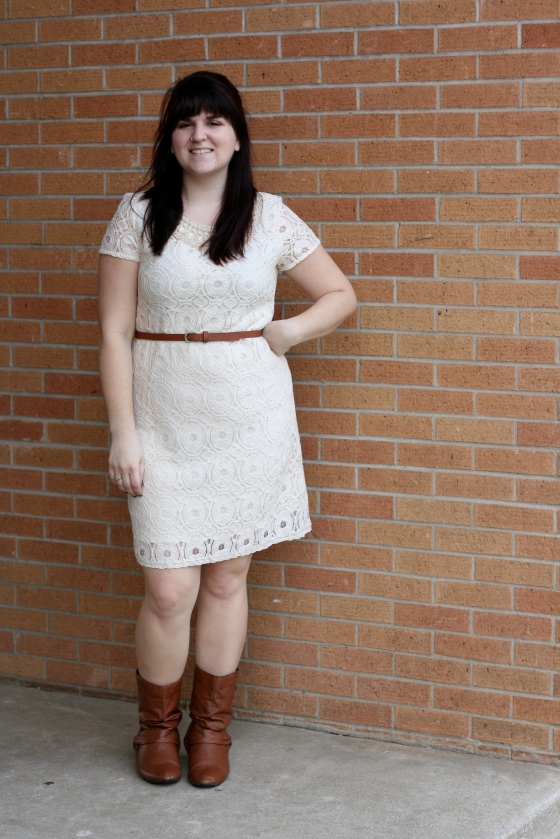
I found this cream lace dress with an embellished neckline for $14 at thrift store in Chattanooga, TN.

Once I had cut off all of the embellishments, I was ready to dye the dress. I bought 3 boxes of dye just for good measure. I filled my sink with scalding hot water, laundry detergent, and few teaspoons of salt.

About 30 minutes later I washed one of the sleeves off and realized it was going to be a while.

It took three attempts at dying the dress to get the desired color.

After the brides approval, of course, I walked down the isle in my new creation!

Three Dimensional Magazine Letters

Recently, while at the mall, I was looking in Earthbound and saw these three dimensional letters made from magazine pages. I thought to myself, “that’s easy enough!” So, I decided to make my very own magazine letter for a special friend.

Magazine Letter

Things you’ll need: Magazines to cut up for your strips, mod podge to use as glue and a paint brush. Here are a few pictures to show you my process. If you have any questions on the method just leave me a comment!

Use the paintbrush to roll your strips

I realized very soon after I’d started that the paper was way too thin to roll by hand. Helpful hint: Use a very small paintbrush to wrap your magazine strips around.

Glue the roll

Once you’ve made quite a few rolls made from your magazine strips, you’re ready to begin making your letter. You’ll need to choose a letter and cut two identical letters from a magazine. (I used the cover from my friends favorite album.) Get creative, spice it up!

Once you have your two letter pieces you can begin to glue your rolls together.

Continue until you have rows long enough to cover the width of your letter. Once your rows are long enough, you can glue them onto your letters.

Glue your magazinge rows onto your letter

Continue until you’ve covered your entire letter with rows or magazine rolls. When I finished I completely cover my three dimensional letter with mod podge just to ensure it would stay together.

Here is another picture of my finished letter.

Three Dimensional Magazine Letter

If you choose to make your own 3D letter, be forewarned…this is quite the tedious craft. Don’t give up once you’ve started…I’d love to see your finished product!